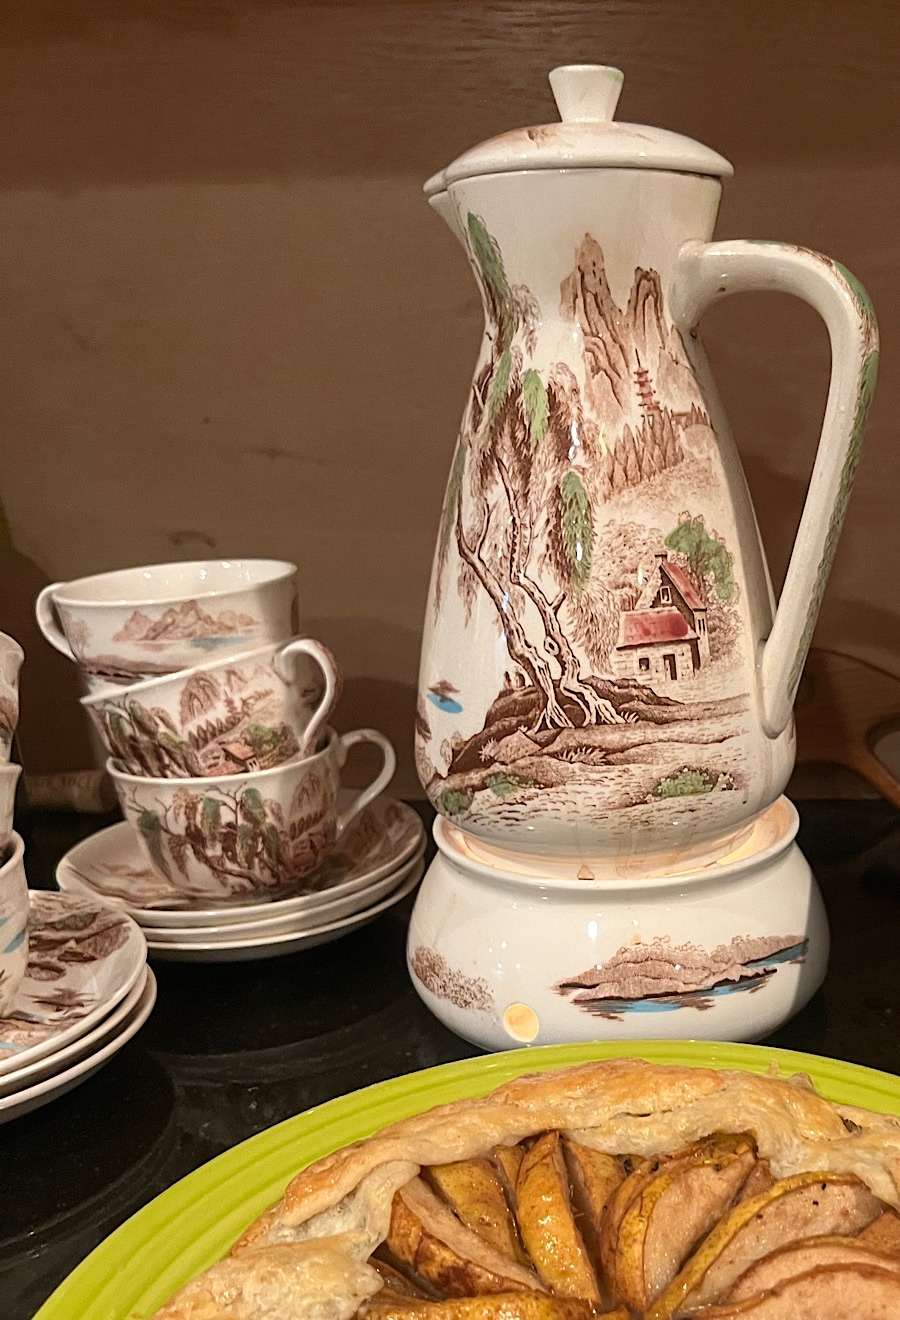
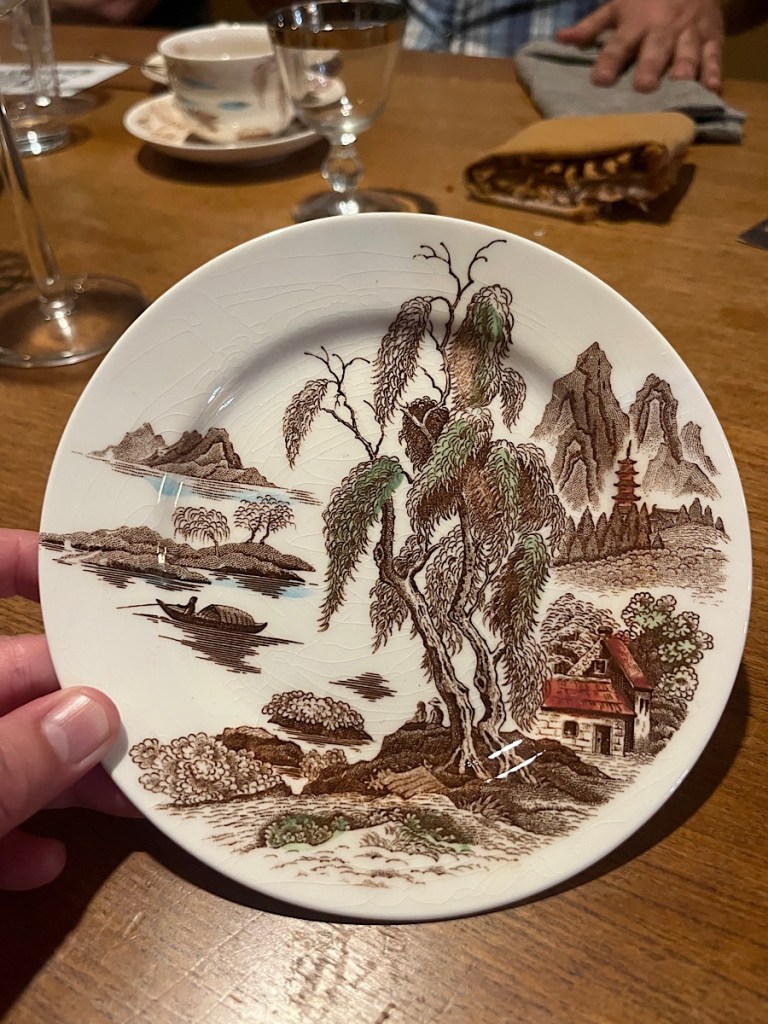
Discerning viewers may have noticed that the china featured in the ESC #49 post was different from my usual options of Churchill Blue Willow (or its saucy cousin, Calamityware) or Iittala Taika. That’s because I finally decided to be an adult and get 12 place-settings of the same pattern—instead of always having to mix and match if I had more than 8 people to dinner.
I came across the coffee pot from the Nasco Sayonara pattern at a local thrift store; I’d never seen it before. The pitcher was missing the lid, so I figured it could be a flower vase and/or orchid waterer. But then I just couldn’t stop staring at it on my windowsill, admiring how well it went with my home decor scheme, which is basically earth tones with pops of turquoise and red (b/c you can take the girl out of New Mexico, but….) So, I made the wild decision to rehome my Blue Willow, which I started collecting as a kid with coupons from Bag ‘n’ Save. Big move—but also, it’s OK to enjoy something and then move on. Then, I went on a mission to collect 12 place-settings of the Nasco Sayonara, which wasn’t an absurdly expensive or difficult project but still required a spreadsheet, as they stopped making the pattern in the 1960s, and so it takes a bit of putting together lots from EBay, etc. to get that many place-settings. I also had to watch the quality because the glaze wasn’t that amazing, and so a lot of pieces are crazed and/or stained. (Stay tuned for a follow-up post on cleaning stained porcelain….) The most exciting part was when I had trouble figuring out how to get a big lot from a shop in rural Louisiana that didn’t ship, and then it JUST SO HAPPENED that my best friend was going to a clarinet conference in that *exact* small town in Louisiana. Go figure, as we used to say. So, she picked it up for me and took it to a UPS store in Shreveport to ship out. I will forever owe her.
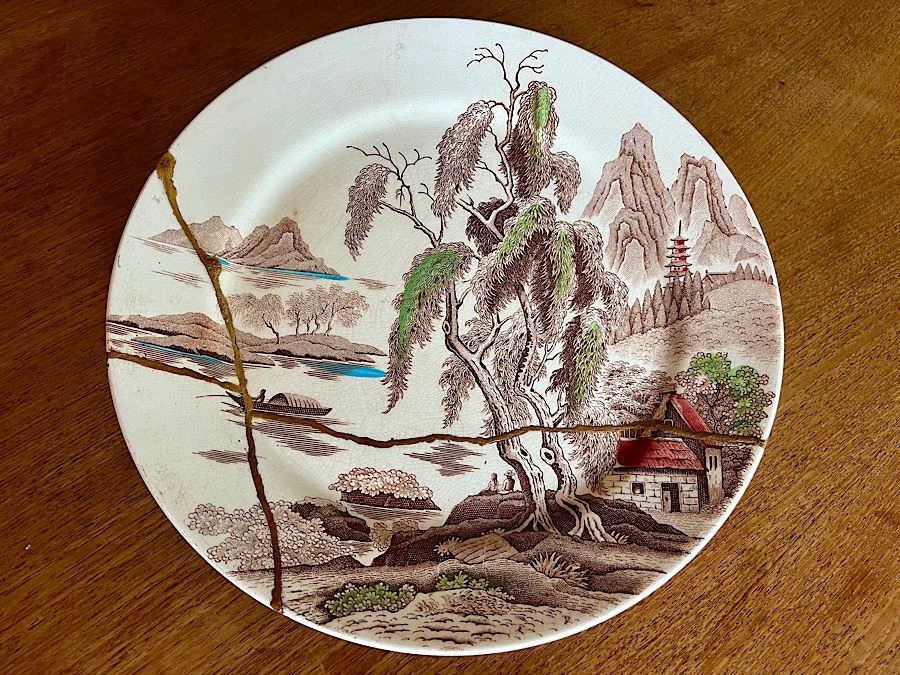
Anyway, most of the pieces arrived in great shape, but of course, a couple broke in shipping, which is the way of things. They tended to be the serving pieces, which are larger and therefore more vulnerable to men chucking them into trucks. Anyway, the vendors were really nice about refunding me, and as I was carrying one particular serving platter to the trash, I was admiring how cleanly it broke (the porcelain is very good quality given the mid-range price of the pattern when it was made), and then suddenly I thought: Hey, I could use this as a chance to finally learn how to do kintsugi the right way instead of the cheater way I usually do it, aka, super glue and a gold Sharpie, which is pretty enough but not food safe.
Enter rabbit hole. Because traditional kintsugi is a process that uses a tree resin related to poison ivy and takes a month or so to complete. Fortunately, rabbit holes are my natural habitat, as you know if you read this blog at all.
So, how did it go? It went okay. On the plus side, I *really* enjoyed the process; it was very meditative and satisfying. And the little kit I ordered was very high-quality and beautifully packagaged. Fair warning about that: tariffs as they are at the moment will result in an additional 20%+ customs fee on those kits, as they ship from Japan, which will arrive in a separate bill from FedEx. Also, it’s not really a “beginner’s kit” as advertised; a better moniker would be “small kit.” Unless you know what you’re doing, you’ll want to *very carefully* follow the directions [and the YouTube video] that come with the kit and only use it to repair a very small broken ceramic piece (like a teacup) with very small cracks—otherwise the gold powder supplied will not be enough for your project. As a matter of fact, if you’re a true beginner like me, I recommend saving the gold powder from the kit and using mica powder on your first piece or two: once you’re comfortable with the finishing process (b/c the powder application is the trickiest step), you can move on to using actual gold: b/c it’s $4800 an ounce right now, so….
After 2 weeks of effort, I ended up with a bit of a wet mess and only about 2 inches of the cracks actually covered in the provided gold powder. I was very frustrated and had to step back for a couple weeks. Part of the problem could definitely be chalked up to newbie mistakes on my part. First, I didn’t exactly pick a beginner piece to repair: you really want to start with something small like a teacup with 1 or 2 nice, clean breaks. With a big piece like the platter, with multiple fractures, I should have bonded only one or two shards at a time with the mugi urushi and allowed each bond to cure for a week before adding the next one—not tried to reassemble the whole piece at one go (the urushi bonds very slowly and thus struggles to hold the piece in alignment in the curing box against the leverage of larger shards). Also, I misgauged the “refining the cracks” stage and used the engraving bit on my Dremel to router them too wide. I learned that the cracks really can be quite narrow and still show up nicely when gilded—and you use a lot less gold powder.
These are all mistakes that a teacher of course would correct for you in practice, but when you’re on your own as a beginner with just a slim translated manual to work from, you’re bound to screw up. Oh well, live and learn. The good news is the process is weirdly forgiving: you can always sand or scrape down what you’ve done and apply more lacquer to get a better or smoother result. So, that’s what I did, finishing the platter with the mica powder. And, I have plenty of materials left in the kit (other than the gold powder) to try another piece in the future. So, in the end of all the steps and missteps, I wound up with a totally functional, food-safe, and pretty platter. I can’t wait to break something else!