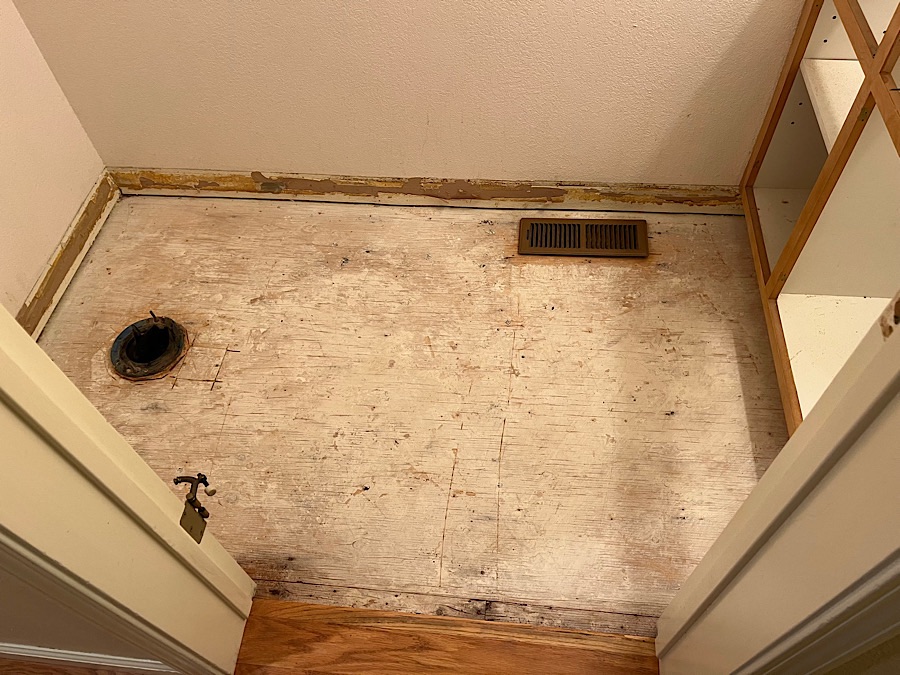
Ah, just look at that beautiful, clean subfloor. This is what it was supposed to look like at the end of Day One. Oh well.
Dramas of the Day (DOD): Not at all bad as it turns out, but there were 3 of them, all related:
- The false subfloor: This very helpful video seemed to indicate that if there were a false subfloor, it was ideal to pull it out and get back down to the real subfloor before installing backer-board, etc. for a new floor. I agreed it would have been ideal in terms of spacing, as it was 3/8” particle board, and taking it out would put the final tile floor basically flush with the hardwoods in the hall as well as flush or a bit below the toilet flange, which is ideal (you don’t want the flange recessed w.r.t. the finished floor as that can lead to leaks as the wax ring collapses over time and leaves a gap between the toilet base and the flange anchoring the toilet to the sewer line. BUT the $1M question was if the particle board were glued down…if so, trying to pull it out would just be a lot of work that would result in a nightmare just as bad if not worse than trying to scrape the rest of the vinyl floor backing off the false subfloor. But, the video seemed to suggest that backer board for vinyl would just be nailed down, not glued down. So I decided to cut a test section out of the false subfloor and see what I was dealing with. Great news: it was lovely and clean, just nailed down without too many nails, and it came right up with some prybar work. So I gambled and won on that one.
- The toilet flange. It looked like it was in bad shape when I pulled out the toilet, and so I assumed I was going to have to remove it and install a new one, either on the cement board or the new tile. But (a) I learned that those flanges actually anchor the sewer line and thus are PVC-cemented into the line, so taking the flange out would mean cutting it out somehow and finding a retrofit flange that would fit inside the old sewer pipe and either glue or lock in place. They make those, but that was a whole other step of the project I hadn’t anticipated and have no experience with (well, I’ve welded PVC before, but not in a high-impact location like a toilet outlet). And (b) on closer inspection (wiping away old wax), the flange was a little roughed up in spots but still structurally OK. And it was already oriented for my existing toilet and sitting at the final height I was going to want anyway. So, as long as I worked around it, I should be good.
- Cutting tools: speaking of “working around it,” I had a couple dilemmas in terms of how I was going to cut the subfloor into sections to get it out—and how I was going to cut around the toilet flange and along the cabinet toe kick to get clean lines there. I am *terrified* of the Roto-zip tool my ex-husband bought and left me in the divorce (he took the Sawzall 🙄). It’s very powerful and not very heavy, so it’s hard to control. But it turned out to be just the ticket in this situation as it can behave like a mini circular saw with the wood blade installed. Some reading of Internet owners’ manuals and a little experimentation had me successfully setting it to a 1/2” depth and cutting tear lines through the subfloor. Of course, it wouldn’t cut all the way to the walls, and I had that toe kick to deal with. Dremel to the rescue, as always. The spiral cutting bit let me carve precise lines around the toilet flange and along the toe kick, and it handled the 3/8” particle board like a champ with a couple of passes.
