
I receive such lovely holiday cards from my friends that I hate to throw them out. So, I came up with a way to display my favorites. Each year I choose 24 cards and cut vignettes from them that I slide into the windowed pockets of this quilted calendar. Then, during the coming advent, whenever I open a new day’s window, I remember the kind person who sent me the beautiful view I see.
I’ve made a couple of these calendars now, so I’ve more or less worked out the kinks. It’s not so much a pattern as a recipe since almost everything is squares. But here are the steps :
1. Get 1 yard each of front panel and back panel fabrics, 1/4 yard each of fabrics for the different door fronts (I chose 6 different fabrics the first time and 4 the second), 1/2 yard of a fabric for all the door backs, and 1/2 yard of fabric that contrasts nicely with door fronts for your numbers. Quilting cotton works well here. Also, buy 1/2 yard of Pellon Wonder Under or other peel-and-stick double-sided fusible interfacing, 1 yard of 3/4″ ribbon to make a rod pocket that will coordinate with your back panel fabric, 1 yard of thin cotton quilt batting, 24 decorative buttons (I did snowflakes one time and gold buttons another), 1 yard of metallic stretch cord/ribbon, a 3-foot 1/4-inch dowel, a stencil for your numbers (2″ works well), thread to match your front panel fabric, 2 yards of 1/4″ ribbon or cord for hanging, and finials or notions to glue onto the ends of the hanging rod (I used acorns on the second one and just tied the hanging ribbons into bows on the first). Wash, dry, and iron all fabrics according to instructions.
2. Cut front fabric rectangle 23 1/2″ x 28 1/2″. Cut strips from back fabric: 1 @ 24 1/2″ x 2 1/2″ (top strip)l 5 @ 24 1/2″ x 5″ (middle strips); 1 @ 24 1/2″ x 5 1/2″ (bottom strip). Press 1/4″ to wrong side on all long edges of strips except top edge of top strip and bottom edge of bottom strip (see picture below). Cut 24 1/2″ of your 3/4″ ribbon and press under short edges each 1/4″ or more (doesn’t matter); stitch close to fold to secure ends.
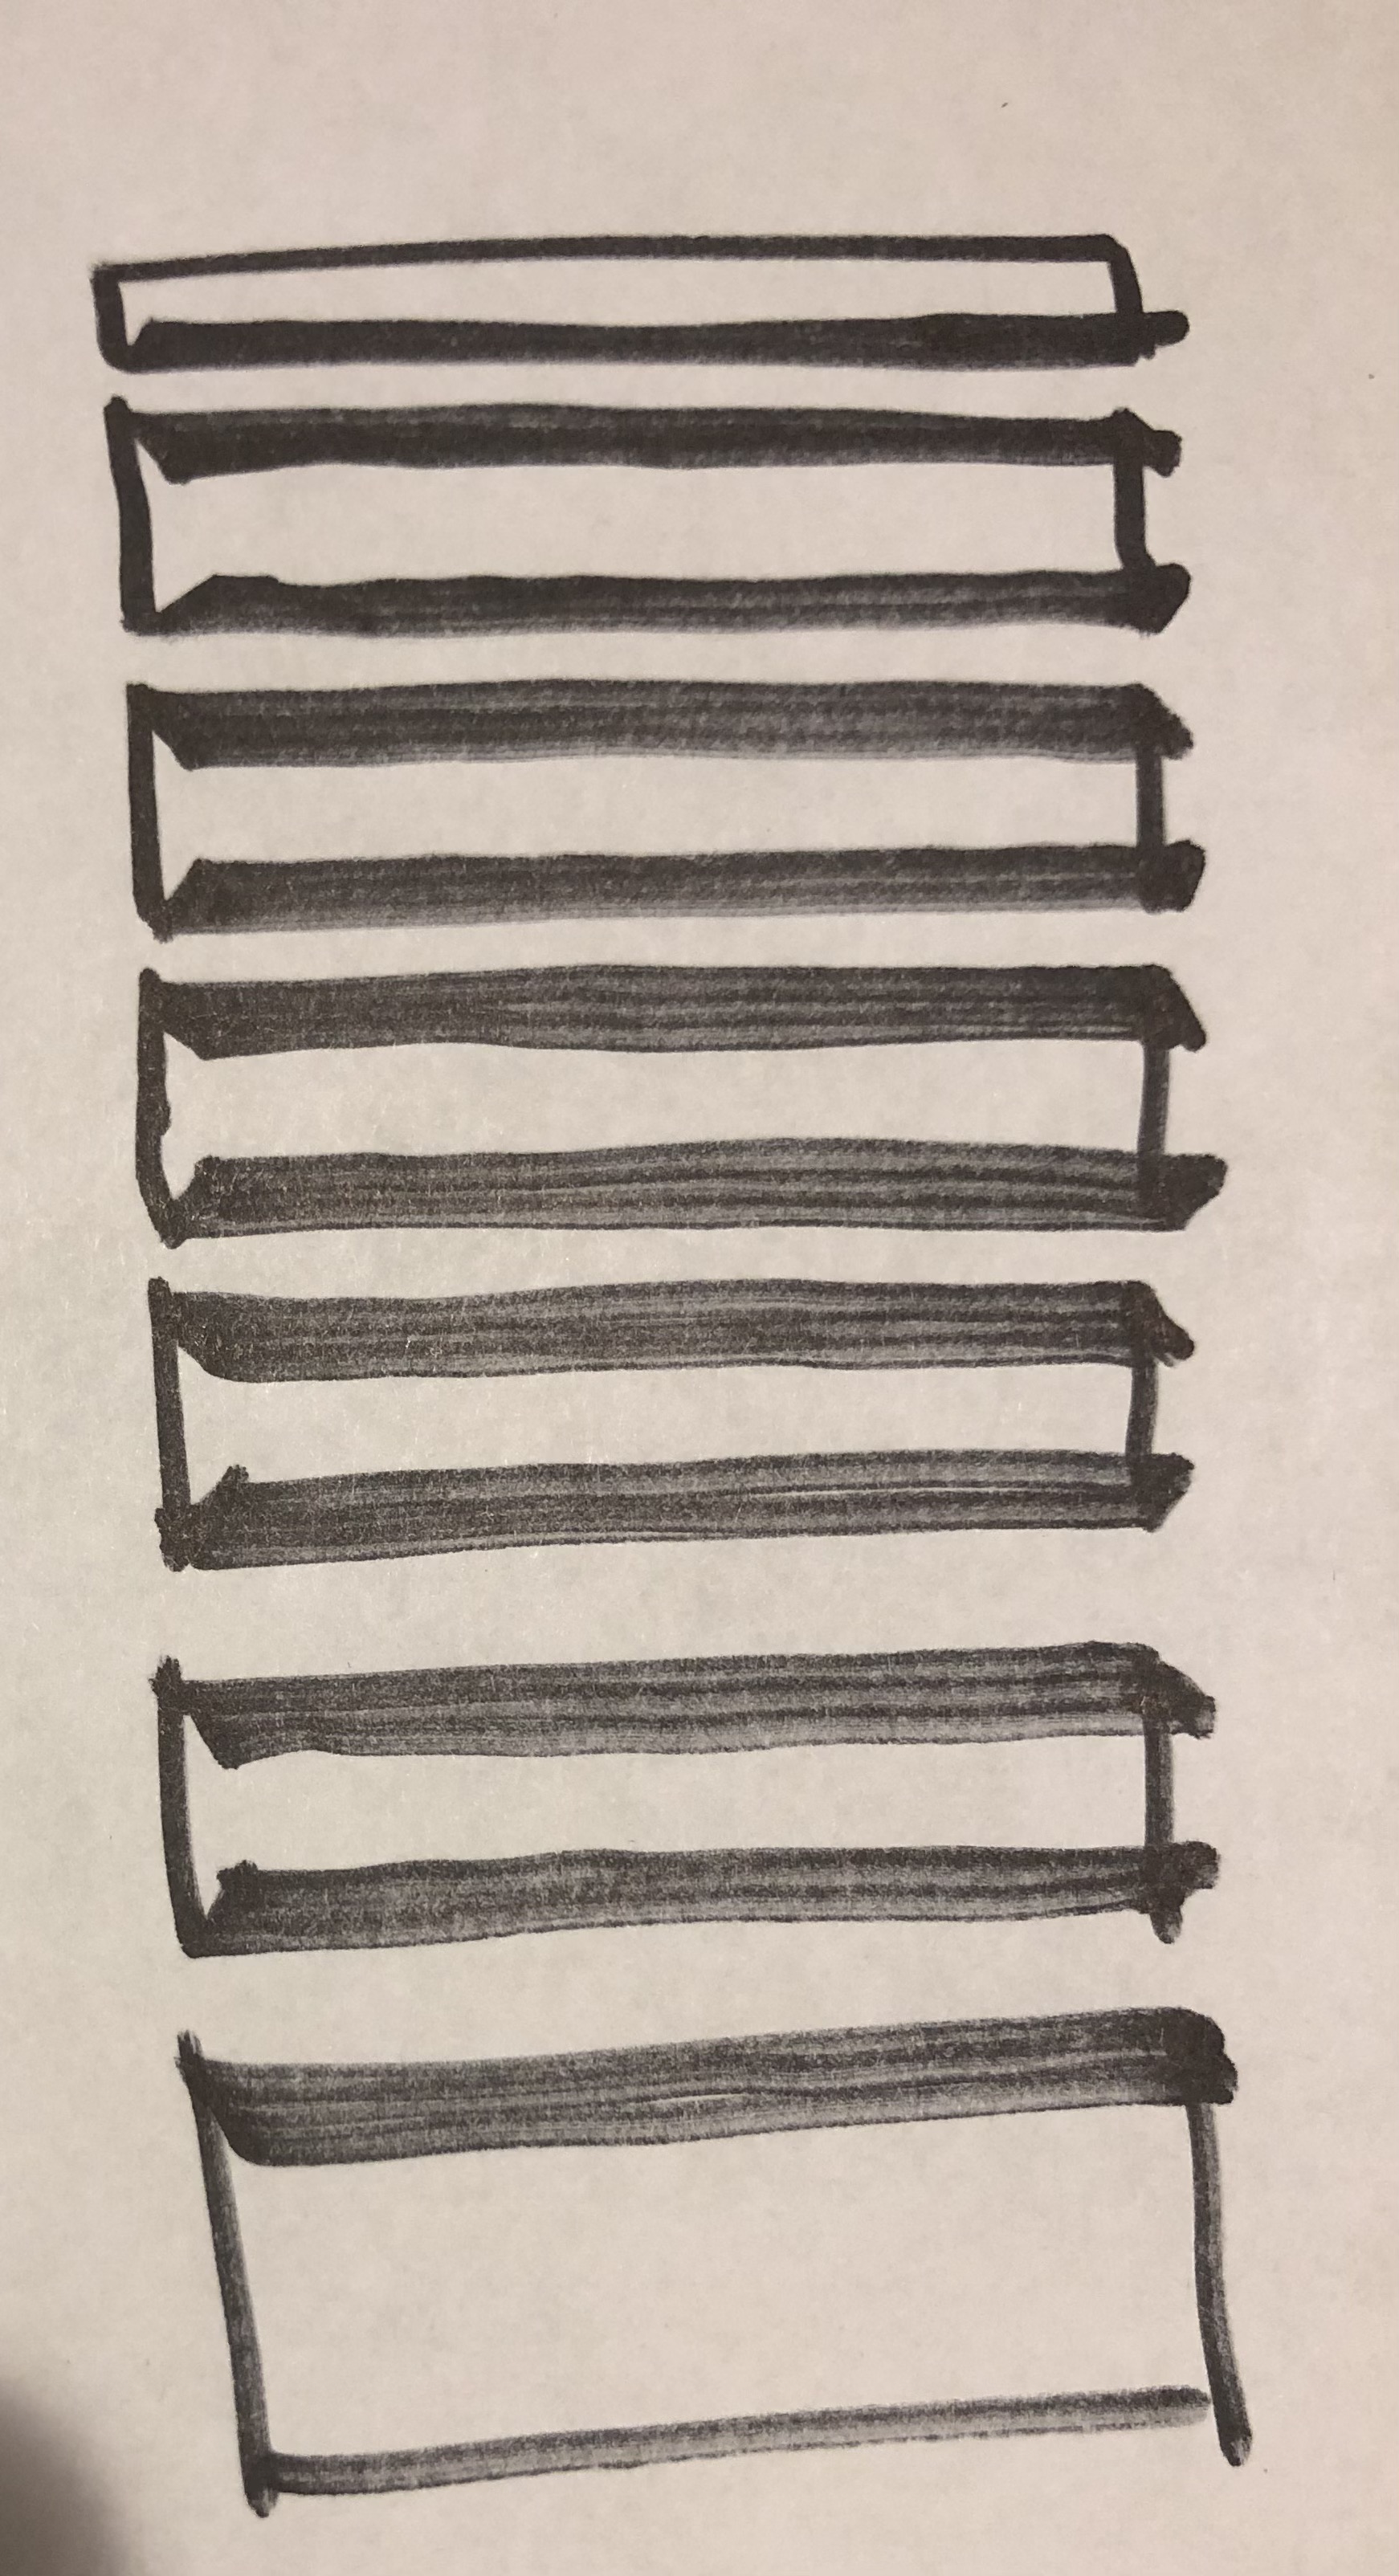
3. Create the back panel with openings to insert cards: Sew back strips together in the order shown above. Starting with the folded edge of the skinny top strip, pin any middle strip to it, keeping right sides together and folding out pressed allowances to pin as you go. Place your first pin 1 3/4″ from left short edges, then place the next pin 3 1/2″ farther along the joined strips, then the next one 1″ farther along. Alternate this 3 1/2″ / 1″ spacing three more times as you pin; you should end up with 1 3/4″ fabric remaining between your final pin and the right short edges of your two joined strips. Sew all segments except the 3 1/2″ openings, sewing in seam allowance crease and backstitching to reinforce start and end of each segment. Repeat this process to attach remaining middle strips to the free bottom edge of the previous strip. Finish by attaching fat bottom strip along its folded edge, using same pin spacing and sewing method throughout. You should now have an assembled back panel that measures 24 1/2″ x 29 1/2″ total and has 24 slits 3 1/2″ each (6 rows of 4 slits). Center and pin rod pocket ribbon 1/2″ down from raw edge of top strip; stitch as close as possible to top and bottom edge of ribbon along the long sides, leaving short finished sides unstitched to create a tunnel for the dowel rod.
4. Create doors: Cut 24 rectangles @ 4 1/8″ x 5 1/8″ from door front fabric; cut 24 same-size rectangles from door back fabric. Thoroughly fuse rough side of Wonder Under to the wrong side of your number fabric following package instructions. Peel off protective paper. Trace all the numbers you will need from your template backwards on the exposed adhesive side of Wonder Under, leaving enough space to cut around them: trace 13 ones, 8 twos, 3 threes, 3 fours, 2 fives, 2 sixes, 2 sevens, 2 eights, 2 nines, and 2 zeros. Cut out numbers. (If you forgot to peel off the protective paper before you cut out the numbers, don’t worry; you just now have to peel the paper from each number before ironing on). Center and space numbers on doors fronts as desired (I eyeball it) and fuse numbers in place according to package instructions to create front doors numbered 1-24. Machine appliqué around numbers using metallic thread. Sew numbered, appliquéd door fronts to door backs, right sides together, leaving 1/4″ from top edge and sewing around sides and bottom of each door with 1/4″ seam allowance. Press top 1/4″ of door front and back to wrong sides. Clip corners and turn doors right-side out, tucking in pressed allowances at top, squaring corners with a chopstick or capped pen. Press doors flat.
5. Create front panel. Create a 3 3/4″ x 2 3/4″ template from an index card or piece of cardboard. This is the size of the windows you will create in the front fabric. Starting at the top left corner of wrong side of your front fabric, position your template 1 1/4″ in from top and left sides; mark each corner of template; lift template and trace an “X” that connects the corner marks diagonally; move template 1 3/4″ to the right (keeping 1 1/4″ from the top) and mark corners again and connect them with an X; repeat two more times; you should have 4 X’s in a row and a 1 1/4″ margin remaining at the right. Create 5 more rows of X’s, each spaced 1 3/4″ below the one above it with the X’s aligned vertically as well. When you’re done, you should have a grid of 24 X’s with 1 1/4″ margins on all sides. Cut along X lines with a rotary cutter or sharp scissors to create 4 triangular flaps that peel back to create a rectangular window.
6. Cut batting: Place front panel on top of sheet of quilt batting and use it as a template to cut out a piece of batting that matches the front panel: i.e., 23 1/2″ x 25 1/2″ with 24 windows measuring roughly 3 3/4″ x 2 3/4″.
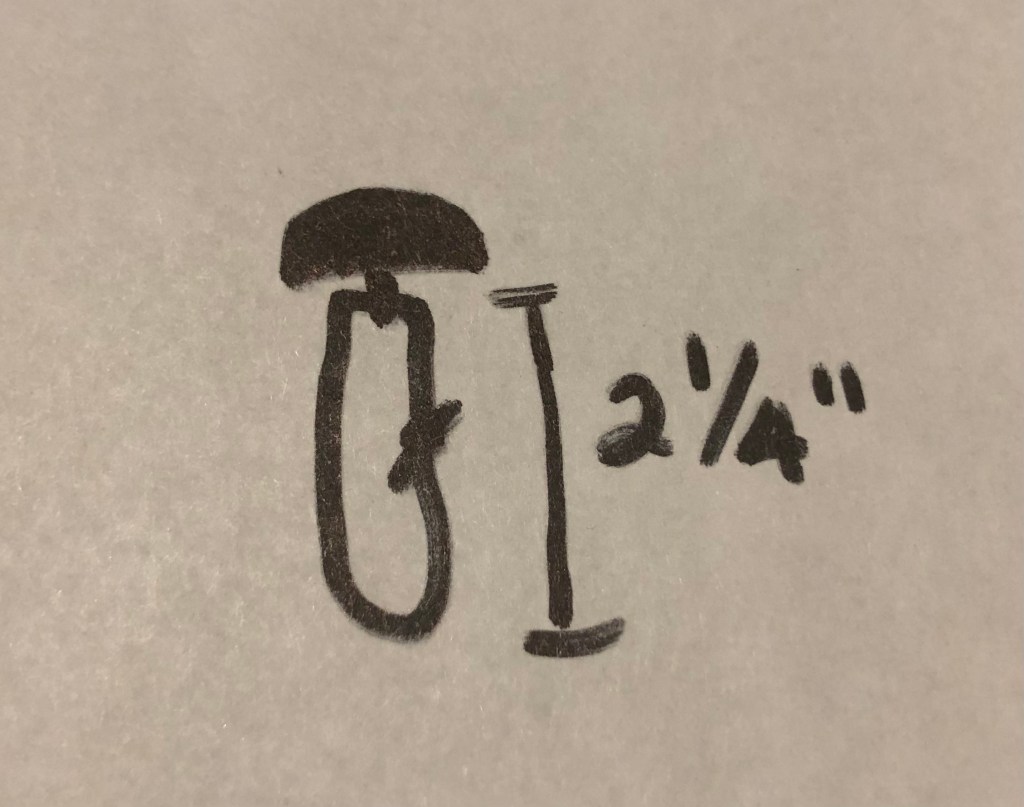
7. Sew doors onto windows, including button loops: Center each door over its window opening and pin top corners (you can arrange doors counting from 1 to 24 from top left to bottom right like I did, or you can place them randomly for more fun). Adjust pins so rows and columns are as aligned as possible. Cut 24 6″ lengths of stretch metallic cord, thread them through buttons, and tie off in a loop with a square knot, pulling very tight and trimming ends to 1/8″ from knot; you should end up with a roughly 4 1/2″ to 5″ button loop (2 1/4″ to 2 1/2″ when cord is doubled–see pic below). Slide a finished button loop between pinned door and front panel with the button sticking out the top. Center the button left to right, hide the loop knot behind the door as close to the top as possible, and pinch loop closed; pin through door and into front panel to keep in position. Repeat for remaining doors. Sew door tops to front panel close to top edge, using metallic thread and a zigzag or other fancy stitch; make sure to catch both halves of button loop below each button.
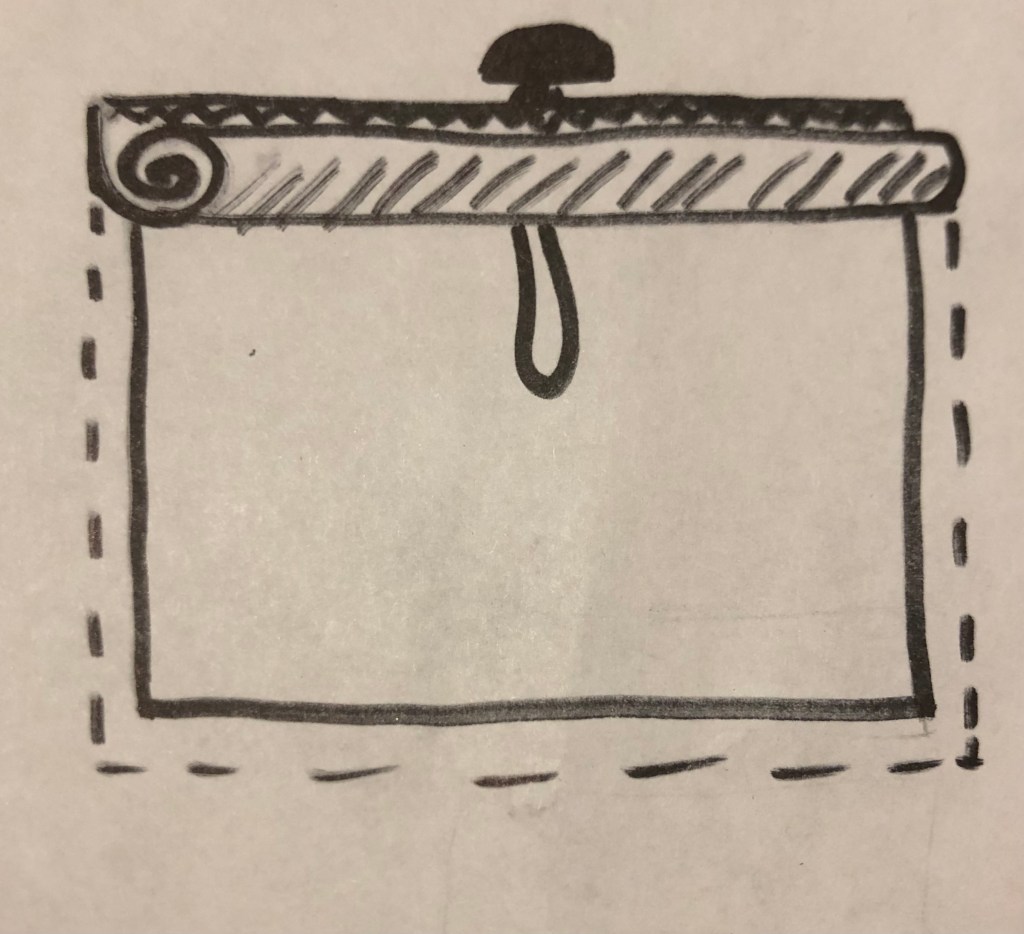
8. Sew front panel to back panel. Place front panel face down on work surface and place batting over it, aligning at windows and edges. Fold triangular window flaps back to wrap snugly around batting, securing each flap in place with a pin inserted from front of panel (so you can pull them out later when front and back panels are sewn together). Trim triangle points as needed so they don’t protrude into neighboring windows. Adjust pins to square up windows nicely. Pin front panel to back panel, right sides facing out, aligning slits in back panel with door tops on front panels and making sure 1/2″ of wrong side of back panel shows on all sides when calendar is viewed from front. Starting in the middle of the calendar and rolling sides as needed to fit into machine, choose a window and lift its door flap. Starting as close as possible to one corner of raised flap, sew through all layers of calendar 3/8″ from window opening around sides and bottom of window, finishing as close as possible to the other corner of the raised door flap–you’ve just made an open-front framed pocket into which you can slide a greeting card from the top through the slit in the back panel. Working roughly in a spiral from inside to outside, sew the remaining window pockets in this manner (see pic below for what each finished door/window looks like).
9. Finishing the calendar: Fold the corners of the exposed back panel in diagonally where they meet the corners of front panel and press triangles down; trim tips of triangles to 1/4″. Fold back panel in 1/4″ all around and press. Fold pressed edges of back panel so they overlap 1/4″ over front panel all around and stitch by hand using a blind hem stitch. Insert dowel rod in rod pocket and tie hanging ribbon to ends of rod; glue finials or notions to rod ends. Cut fronts from 24 recycled greeting cards into 4″ x 3″ cropped images and insert into pockets of windows through back slits. I like to write an annotation on the back of each image noting who gave me the card and in what year. Each day during advent when I open a window, I roll up the door and secure it with the button loop. When the holiday season is over, I release all the doors, iron them flat, swap out old cards for this season’s, and fold the calendar up to store in my cedar chest until next year!

2 thoughts on “Quilted Advent Calendar for Recycled Christmas Cards”